After a long mental debate I decided to forgo the muriatic acid/peroxide homemade etchant route. Watching videos and considering all the precautions and risks involved, it seemed to me, given the nature of my clumsy self, that this would just be a recipe for trouble. So I decided against that. I went instead and ordered a bottle of ferric chloride. Ferric isn’t exactly cheap – $30ish USD, and it aren’t necessarily a whole lot safer than the acid route, although reading along it appears to be somewhat.
But whilst doing reading one day on the subject, I discovered another method. This one involved using household cleaning vinegar (stronger stuff than regular table vinegar), peroxide, and salt. I’m not at all certain how it works, but in the few videos of the process I could find I did discover that it does in fact work. So I figure, what the hell? I head to the pharmacy and pick up a bunch of peroxide bottles and then some cleaning vinegar at the grocery store. Salt, obviously, I already have. Sweet! Let’s see what happens!
The instructions, such as they are, suggest a 50/50 ratio. So that’s what I do. I get a nice plastic tub, and pour in equal parts vinegar and peroxide. They say to always add acid to whatever you’re mixing it with, not the other way around. And although none of these components seem particularly dangerous, I have no idea what I’m actually concocting here. So I’m doing this out in my well-ventilated garage, I’ve got safety glasses on, full rubber gloves — the whole nine yards. And I’m pouring like the bartender in Drip Along Daffy — making cobra fang juice/hydrogen bitters/old panther shots for Nasty Canasta.
On first blush, there’s nothing to report. Apart from a strong vinegar smell, there’s nothing exciting or scary going on. So I drop my board in.
Nothing’s happening.
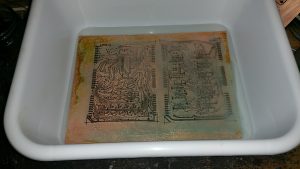
Now, I’ve been warned this method tends to be slow. Basically from what I understand, we’re creating a weak hydrochloric acid here. After five minutes, the copper is starting to change colour a bit, but it’s clear we’re not getting anywhere significant. So I go to the instructions again and remember the salt, which they theorize ‘accelerates’ the reaction. Ahh…. now we have action:
I keep checking on it every few minutes, periodically adding salt. At some point in the process, I don’t know how or why, the etching becomes much more aggressive — there’s fizzing, clouds of stuff coming up from the board. And I’m seeing, finally, some of the PCB being exposed.
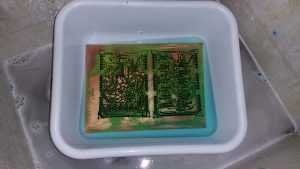
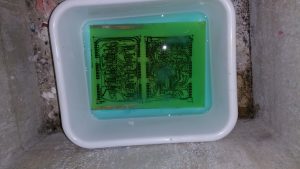
The liquid in the tub is turning a blue color — I think this is copper chloride? It’s been a long time since Grade 12 chemistry. Every once in a while the reaction slows and I find I have to add more salt to the remaining exposed copper to keep it going. Eventually though adding salt proves pointless. It looks like we got most of the copper etched off anyway:
The green color looks fantastic and I’m thinking maybe my Chinese FR4 were the right call — but of course the color is being accentuated considerably by the blue etchant. I also learn by accident that this stuff isn’t all that harmful — although the powerful vinegar smell is a bit off-putting, splashing a bit accidentally onto my skin produces no burns. I wouldn’t want to try a skin soak with it or anything, but hey.. nice to know we’re not talking about instant chemical death.
Comments: this method is slow and requires constant intervention. And you need a lot of it. On one board I tried to reduce the total amount of ‘etchant’ I made.. it wasn’t enough. You need like two of the 500ml peroxide bottles and 1L of vinegar and a whole bunch of salt to do these big 200mmx300mm boards. And it’s not cheap — peroxide retails anywhere from $2.00 – $5.99 for a 500ml bottle. Yikes. But, it has the advantage of being readily available and far safer than that nasty muriatic acid.
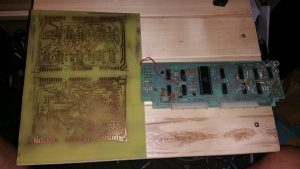
Back to color – the resulting board it turns out is fairly green, which is great. It’s got a bit more of a brown twinge to it than what I was expecting for a vintage-look PCB. Putting up against a vintage Digital Group board shows the difference:
I did end up also etching a small piece of that sample board American Micro was kind enough to send. And I’m glad I did, because it was way more brown coloured than my Chinese FR4 stock. It would not have looked right at all. So that’s a $400 mistake missed. Kudos to American Micro though for their service and being willing to provide a sample in the first place. If it weren’t for the color, I would have happily spent the money.


